


Into THE PIT (Part 2)
- Brianna Clark
- Mar 1, 2021
- 8 min read

Footings and rebar install, a late night soirée...
The day that Astrof (our concrete hardware supply company) delivered our first round of rebar, the noise of them throwing the rebar off the truck was equivalent to probably that of a bull running through a china shop. And this was just rebar for our footings... As we finished up constructing the rest of the footing forms and patching any holes where concrete would potentially leak through when poured, Old 40 Grit returned to the scene with a couple lads in tow. “Today, we are bustin’ some bar!” He declared. And bust bar we did. For us common people, that means “To install rebar,” and I refer to us as common people because people that work commercial concrete for a living are all freaks. In the best kind of way, of course. Seriously, go sit outside a concrete supply place and watch the guys that go in and out. They all look like the incredible hulk. After a day of bustin’ bar, I understood why. Everything is heavy, and if it isn’t heavy, it is super long and awkward so you get a free workout carrying or lifting just about anything on a concrete job. Not to mention the amount of sheer repetition of grip work one gets in a day’s worth of rebar tying made it so I couldn’t even tie my shoe the next day.

We started by staring at the structural drawings that were provided by our engineer to get a sense of how the heck we were going to pull this off. On Jim’s command Brian and I carried out our shiny, only used one time rebar cutter we had scored off Craigslist the day prior. I admit, I grumbled when Brian asked if I would buy it, but this thing would become my best friend in the coming months. Jim took a #4 (1/2 inch) sized piece of rebar, popped it in, pushed down on the lever with his arms, then his body weight, and after a couple back and forths finally WHAM. The bar snapped. So did Jim’s body, since he said, “Oh hell no, I am going home to get my band saw. Be right back!” It was only 1/2 inch rebar! Skeptical, I decided to give it a try. I slipped in a #4 bar and after a few cranks on the lever... BANG. Well, that was... fun... If you liked experiencing a nice almost electrical jolt through your entire upper body just to make sure you are still mortal. The great thing about our structural design was that not only did we have standard #4 rebar, we ALSO had #5 (thicker at 5/8 inch) and even #6 (3/4 inch) rebar! How in tarnation were we going to cut those?
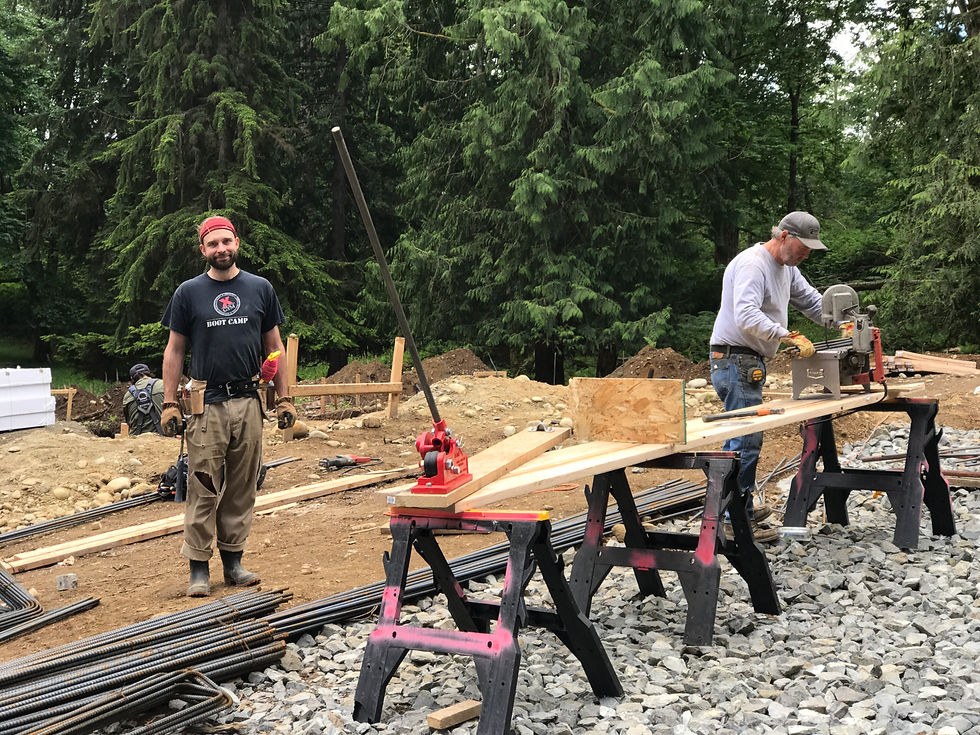
Anyways, Jim returned with his band saw and started cutting or bending the pieces per the drawings. Donny and Bryce started by using the full length (20 foot) bars lengthwise in the 69 foot long footing, which would be where the West wall that contains our front entryway will eventually sit. After laying them out lengthwise, they used spray paint to mark them every 12 inches to make it easy to place the next round of bar that would be installed and tied perpendicular to these bars, basically making a grid.


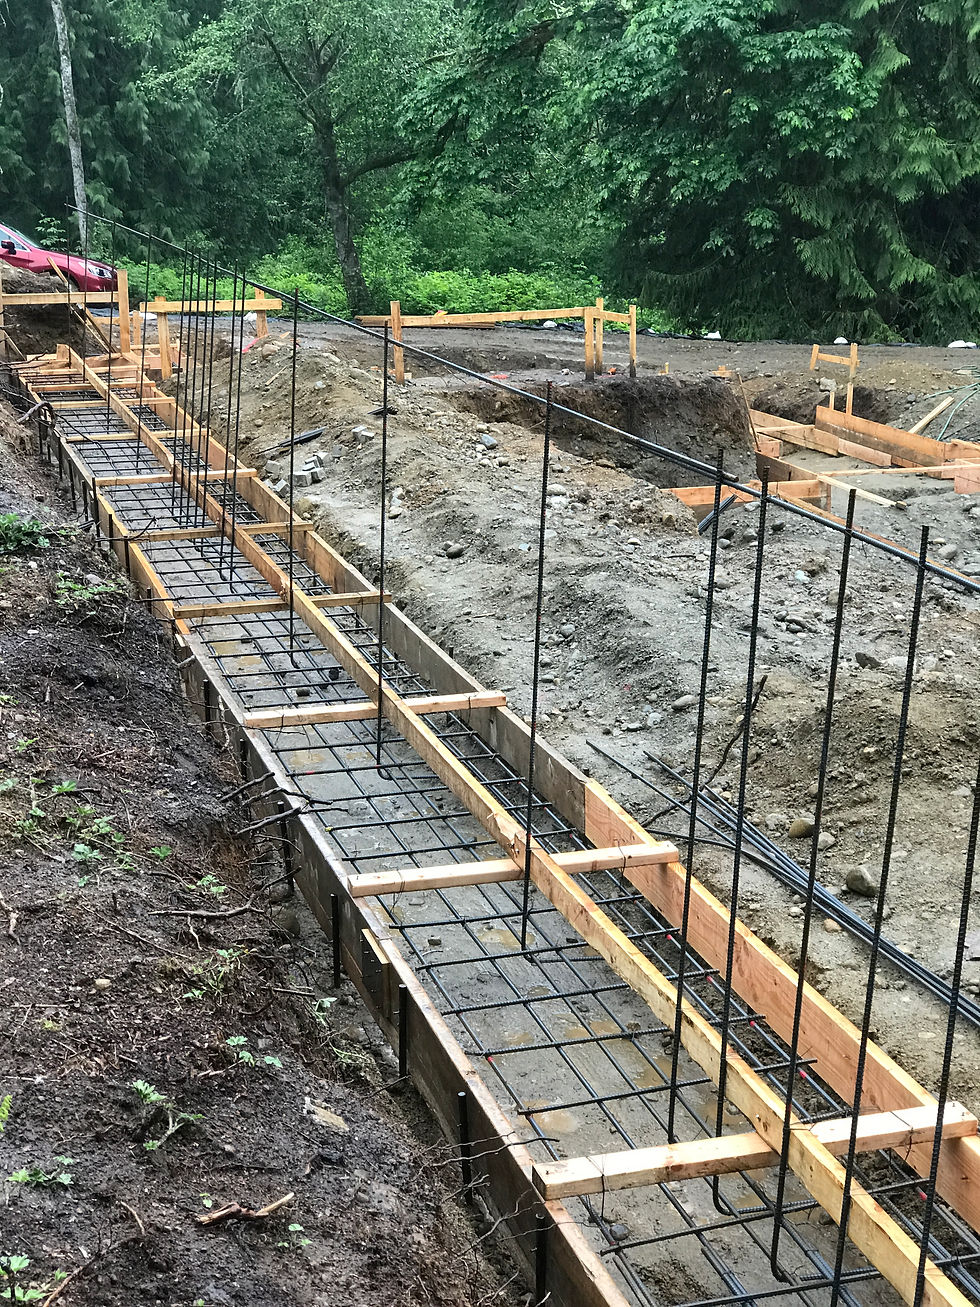
Jim tossed down the next round of bar, and they began tying it together using steel wire. After making the grid in the footings, next they tied in small pieces of “L” bar to start creating the base of the vertical sections, and then the longer pieces of bar that would eventually tie into the rebar in the wall. There you have it, our first footing was done in no time! Easy right?
Well, straight forward is one thing, but just because something is that way doesn’t mean it doesn’t eventually become hard after the thousandth time doing it, weeks on end. Jim and his crew were pretty much only available on weekends, so we picked up from there and off we went, rain or shine, although we did step away whenever lightning was over us.


We recruited friends for rebar tying parties and we paid them in beer and burritos, however, I think we still might owe Jordan something for being our “Surcharge troll” and army crawling underneath our already tied footing grid in order to wire up some additional bar that we forgot in that godforsaken arch enemy of mine, the surcharge trench. Oops. “Into the pit!” Remained the cry as he slithered to get the job done, while I did my part by laying belly down on all metal and shoving my arms in between the bars to help him finish up. Good thing I got a tetanus booster that morning, ha!


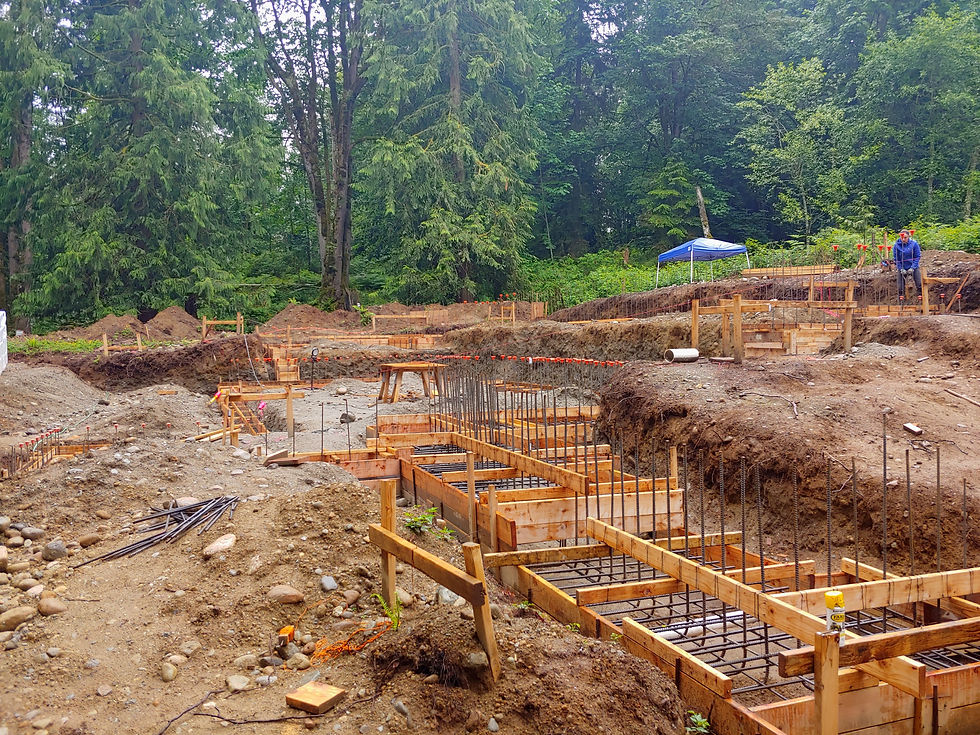
The time came to eventually cut our lovely #5 and #6 bar that would be installed in our largest footings. These footings had elevation differences that required creating steps in the footing. A footing "step" requires a continuous piece of rebar from the top to the bottom extending out either end approximately 3-4 feet. So the only way to achieve that is to bend the bar into a "Z" shape. We had to bend 14 of these "Z" bars total. Due to the length of the bar, we couldn't bend the "Z's" with the bender flat on the ground without stabbing 3-4 feet into the ground itself. Luckily, smart Brian and brute Bri were able to pull this off by Brian staking some rebar into the ground, and wedging the cutter in on its side. Bri would then push the lever with all her might while Brian pulled to complete the bends of the "Z." Those who bend rebar together... Stay together? (Barf).


One week later, Jim stopped by to see what to expect for weekend work and was surprised we had already banged it out! Finally! Something was going smoothly. Brian made our first inspection appointment with the county, and I started the somewhat hectic task of coordinating the concrete mix delivery as well as the concrete pump truck. Yes, you must coordinate a concrete supplier to bring a truck of concrete, mixed to your specification, and then also call a different company that has a boom truck (hydraulic crane with a pump) to dispense the concrete from said concrete truck over your entire job site (footings, walls, etc.) After calling around to get some quotes, I decided to go with smaller local companies (North River Pumping and Smokey Point Concrete) and I am glad I did because after the initial back and forth calls to coordinate them, they continued coordinating with each other up until pour day, which was amazing! I was glad I called early too, since after that date they were weeks out on availability.


So, remember in my last post when I ended with something about a surprise from our structural engineer? Right. Back to THE PIT. The Snohomish county inspector came on the Thursday morning before our weekend pour was scheduled and checked that our footing dimensions matched the drawings and rebar spacing. All of that looked good, he said, except for one detail in the drawing of our second widest footing. The detail the engineer specified for this footing didn’t allow for a wall that was over 9 feet tall on top of it, and ours would be 11!!! This happened because we ended up having to dig the footing deeper to get to good soil, making our wall taller than expected. This was hysterical, because Brian had actually called the engineer a month prior asking about this exact thing!!!

The engineer had reassured Brian that the additional wall height would be fine as drawn. Which meant we could build it as we had planned, regardless of the drawing. When we explained that to the inspector, he said if we got it in writing from our engineer, we would be approved and pass our inspection. So, Brian called the engineer and told him what we needed so that we could pass, and the engineer decided that he would in fact have to redesign the entire footing and wall. This also meant that we would have to A.) Have the engineer finish his drawing that day B.) Retrieve said drawing that day because he couldn’t email it to Brian C.) Tear apart our footing that day which had 2000 pounds of rebar already installed D.) Somehow source another quantity of #5 and #6 rebar, not found in stores that day E.) Reconstruct our footing that day so that we could schedule another inspection the next morning in order to pour on the weekend as scheduled. We suddenly were very busy that day. (Remember that the concrete companies were weeks out, so we had to make this pour date to have half a chance at finishing our foundation this summer)!
When the engineer said he could have the drawing to Brian next week, Brian said, “No, we are going to have it tonight,” to which the engineer replied, “Are you even sure that your contractor can get this done by then?” Silly engineer. We ARE our contractor. Lucky us. Brian proceeded to ask where the engineer lived and made plans to wait outside his house (after being at work all day) in order to retrieve the drawing for our newly planned evening soirée. Still working night shift, I left work immediately upon hearing this news and prepared for battle. When I arrived all hands were on deck and I was elated to see Jim had saved our asses by magically having #5 and #6 rebar on hand for “fun projects” around the house. We are truly lucky to know him! Brian, Brian’s mom (Mag), Brian’s dad (Dan), Matt, and Jordan were there already prepping to bust some more bar, headlamps on. Brian demanded my car jack, and told me the plan. Ingeniously, instead of tearing apart all of the ton of rebar, he decided that we were going to attempt to place everyone’s car jack under a section of rebar grid, move the footing forms back the required distance with the jacks holding the current rebar structure in place, and then splicing more rebar onto the existing ends to get our fabulously overengineered newly designed footing requirements. We watched the jacks intensely as we all pulled our section back, and I’ll be dipped in dog doo, it worked! Now all we had left to do was re-tie some sections and finish splicing to get the rest of the length met. The hours rolled by, the crazies started to set in, but we did it. We redesigned an entire footing to spec in a matter of hours. Then, it was time for a much needed drink.


The next morning the inspector came, took a brief look at our nighttime accomplishment, and approved us. We were finally ready to pour! Except for one little thing... Have I mentioned that at present time of this story we had had 6 straight days of rain where there was over 4.5 inches of total rainfall, and two of those days it rained over 2 inches? Of course, most other days that weren’t significant also had rainfall, so safe to say it was an extremely rainy end of May to early June, even for Western Washington. Which brings me to my point. We woke after a storm one morning to find a lovely new water feature flowing in our master bedroom.
I looked at Brian and said, “I don’t remember telling you I wanted a waterfall as part of our master suite, how did you know?” To which he did not reply with more than a mere shake of his head. We were told you could pour concrete on top of some water, but we both figured that if the water had a flow to it, then we should probably take action to remove the water feature before pouring. But how does one remove literal ground water that is seeping through the earth all the way into your foundation? You guessed it. MORE digging! I will spare the details since we already made our readers sit through several other posts that spoke of this, but just know that our ground water was actually coming from our neighbor’s property. Therefore, masochist Jordan returned for another free workout and helped Brian hand dig a sort of diversion trench from a culvert on our neighbor’s property all the way around the side of our future house so that it would drain down to our “Wetland” below.


Are we FINALLY ready to pour now?? Find out on the next episode of Bri and Brian Build.
Courtesy photo of baby Rocky and Sundance for reading to the end of this hefty post:


Comments